I have successfully printed several parts in a row without human interaction. Check out the video:
Category Archives: Projects
Harvey’s Super Huge Printer Now Moves
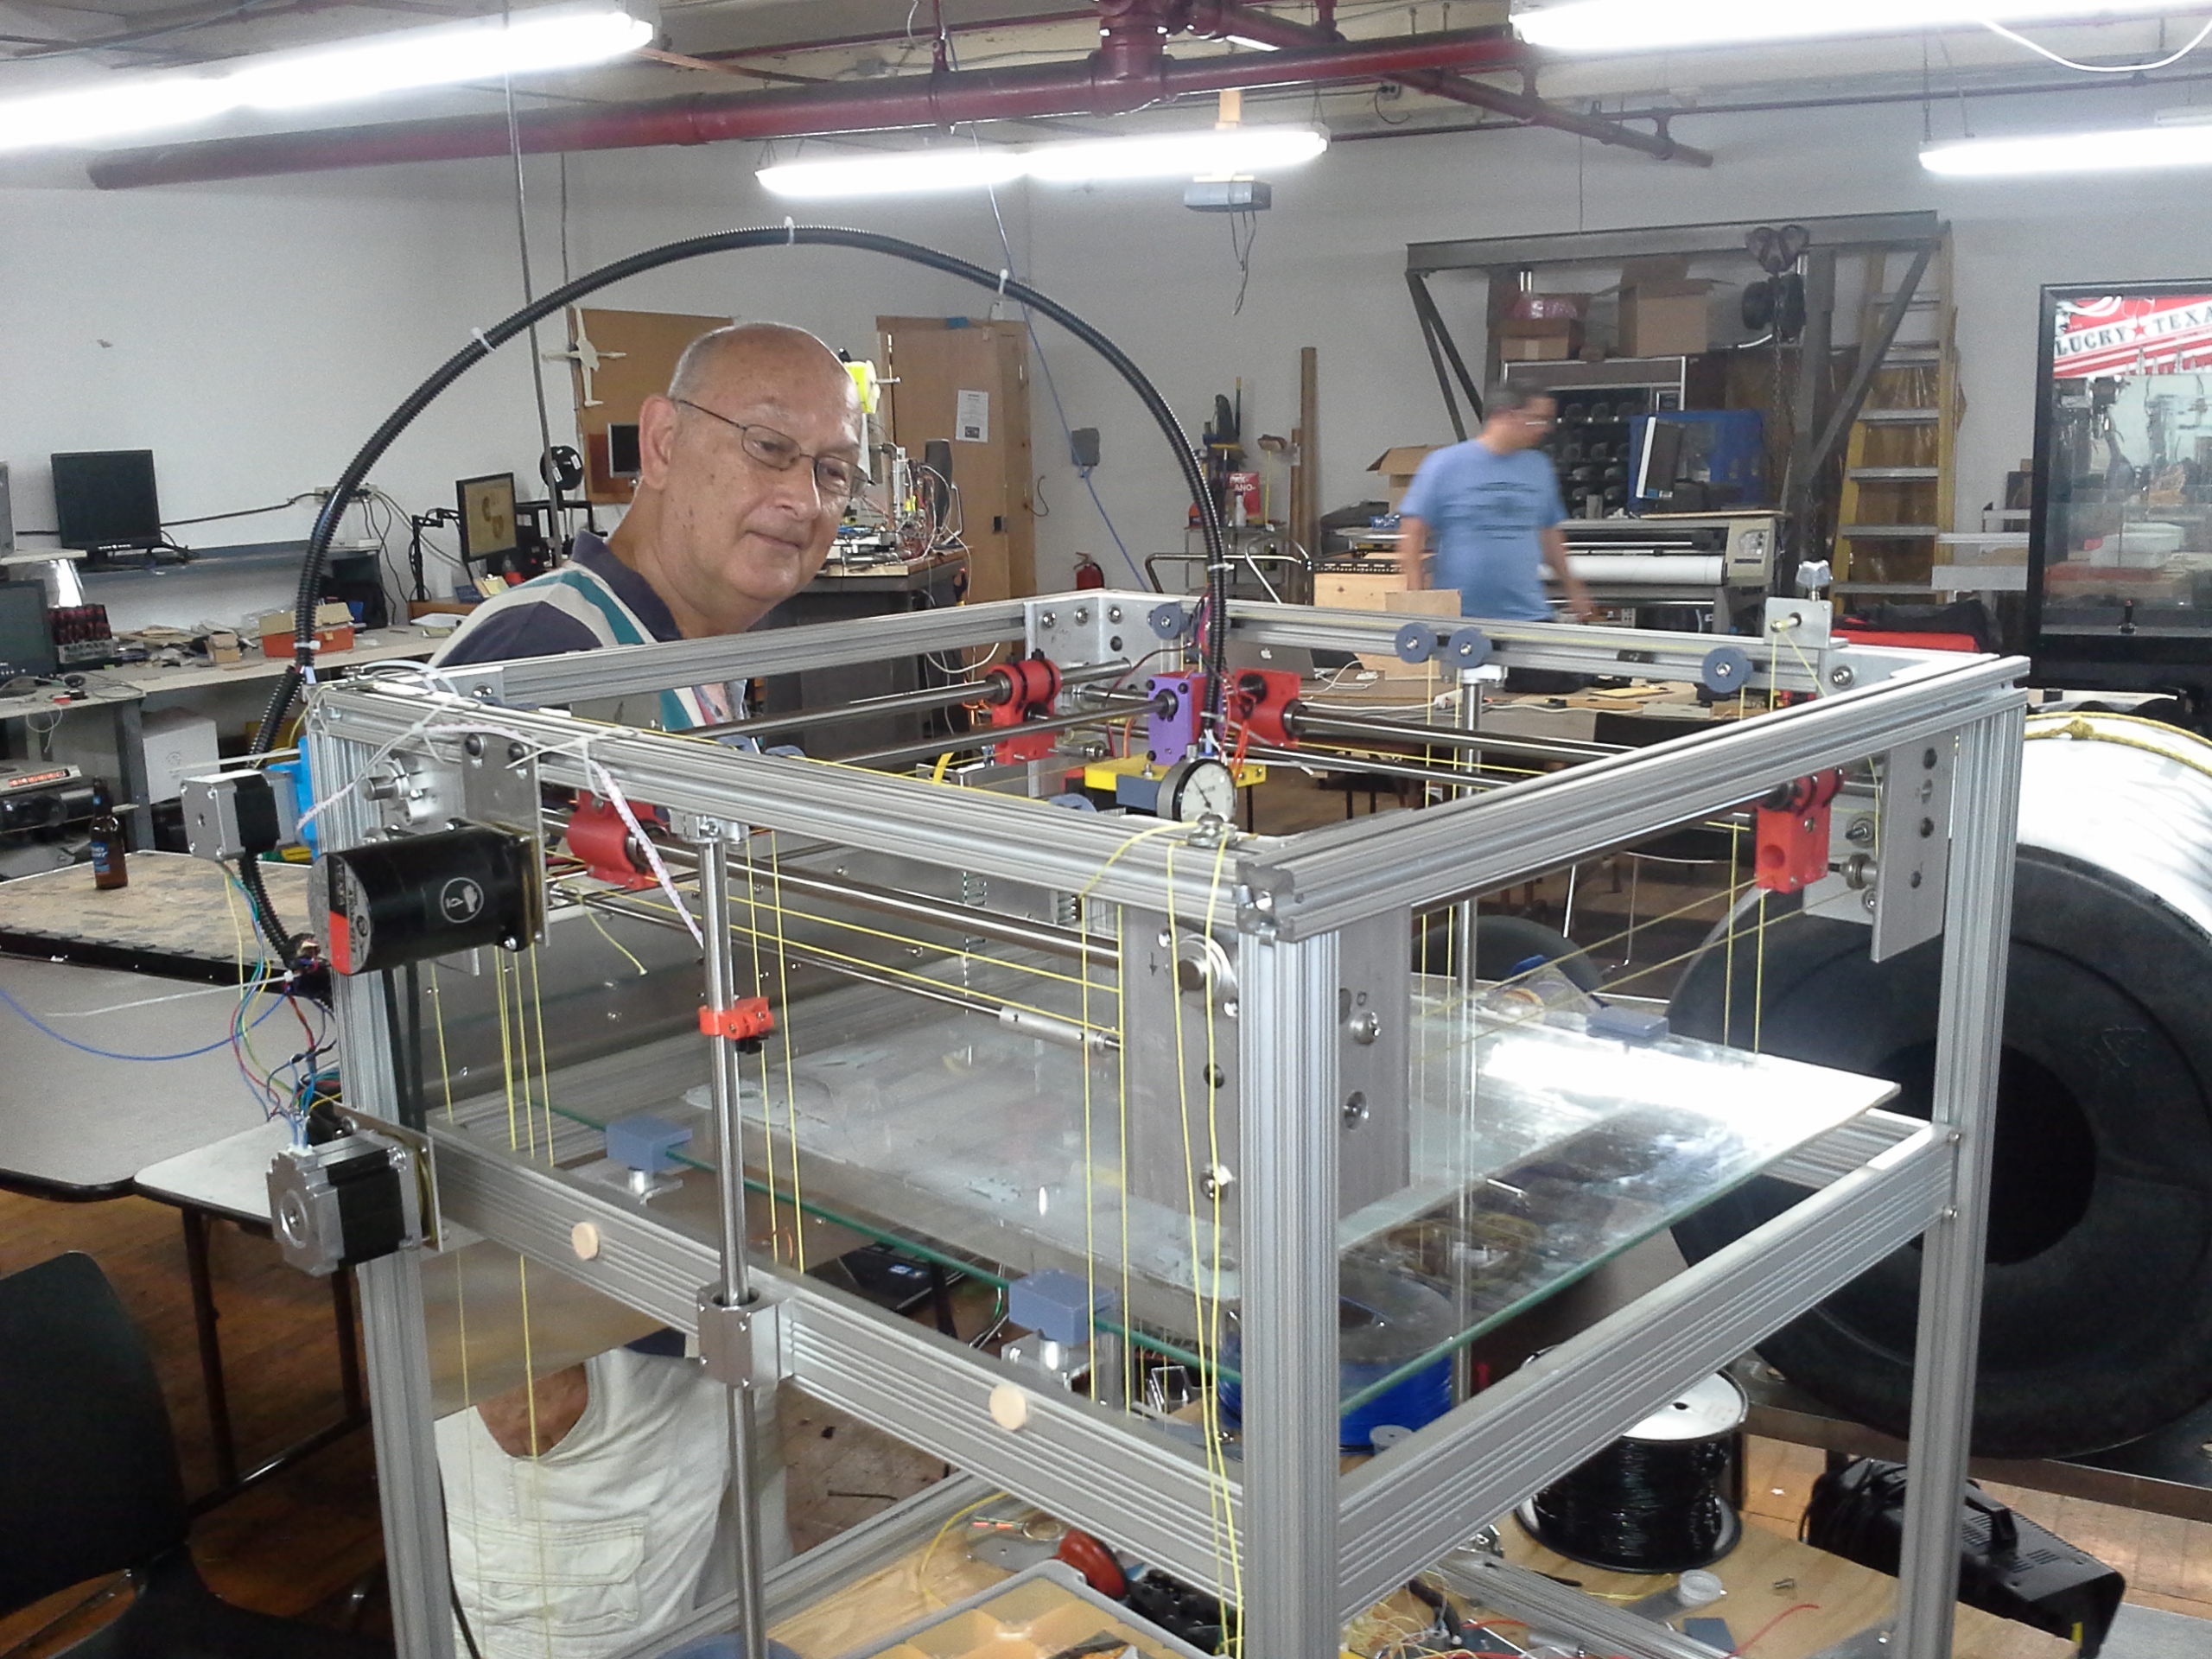 Harvey has been working on this unreasonably huge 3D Printer for longer than most of the other members have been alive. Well, today marks a momentous occasion, it now moves in all 3 axes!
The printer design is 100% Harvey. It’s all scratch built and went through many on-the-fly revisions during the assembly process. The frame is a 2 foot cube and the print area will be 15 inches cubed. He’ll have to rent a pickup truck to move it!
The Z-axis isn’t leadscrew or belt driven like found on most printers. Here, there’s an elaborate system of kevlar fishing line and pulleys. Today it worked perfectly, raising and lowering the print surface evenly. Now it’s time to set up the firmware and limit switches!
New 3D Printer Project, the iTopie
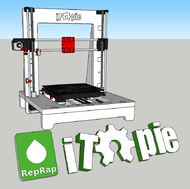 Today I started a new 3D Printer build. I found what appears to be a great derivative of the Prusa i3, the iTopie. The i3 looks simple to build but it looks as if it could be a little flimsy with the threaded rod frame.
The original design was made for 16mm MDF. Home Depot only has 1/2 inch so I modified the DXF file a bit to compensate. I also added a handle on the top of the printer frame and make the base a little taller so I could fit an ATX power supply under there.
I used the CNC Router to cut out the parts. The overall cutting time Continue reading
New CTH Hackerspace Passport Stamps
Reply
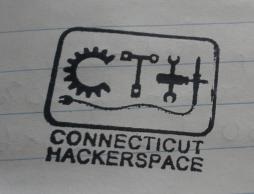 CT Hackerspace has two new hackerspace passport stamps c/o neighboring hackerspace NESIT and their Epilog laser cutter. They were cut out of regular stamp rubber. The ‘handles’ are just pieces of wood with the logos engraved in the top.
So next time you swing by, bring your hackerspace passport! Check out Hackaday for a bunch of ways to make a passport stamp as well as how those methods actually work!
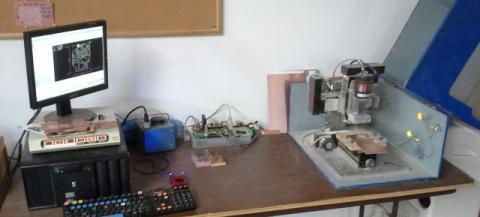
4″x4″ CNC Mini Mill
Here’s our story about our CNC Mini Mill / Engraver that was put together by several of the CT Hackerspace members. We use this mostly to cut PCB Boards, but we’ve used to a little to carve stamps (like our Hackerspace Passport Stamp) and to cut some plexiglass. I’ve been meaning to write this up for a very long time but the Hack-A-Day Henchmen article got me to get off my butt.
Making a Hackerspace Passport Stamp with a CNC Engraver
Admittedly, we got caught off guard when a foreign hackerspace member stopped by to visit and asked for a stamp on his Hackerspace Passport. Well, we didn’t have one. A few days later we did. Here’s how we made a Hackerspace Passport Stamp on our CNC Engraver:
Design:
We already had our logo made in Inkscape so we converted it to dxf format and loaded into Draft Sight, a free and awesome 2D CAD program from Dassault Systemes. The coolest part of this fully function software may be that it runs on linux. But anyways, the design was modified to meet the size requirements specified on the Noisebridge site. Some of the geometry had to be changed to allow our smallest endmill (1/32″) to mill out the pockets required. REMEMBER to mirror your CAD drawing at this time so that your stamp doesn’t stamp a mirror image of your logo! We didn’t make this mistake at first, of course, because that would have been really dumb and completely obvious after the fact.
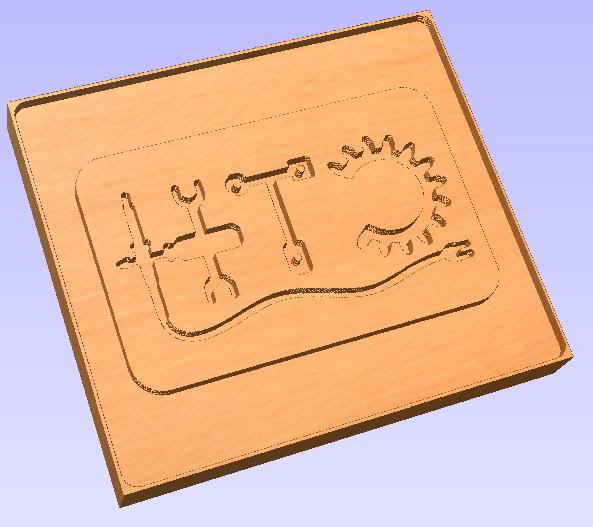
CAM Simulation showing what the stamp should look like.

EMC2 is ready to rock and roll!
Cutting:
You may not have know this but craft stores have material for making stamps. We purchased a piece of stamp rubber for $5 that is large enough to do 6 or so passport-sized stamps. Incase you were wondering, yes we paid extra for the pink one.
The mill is 1/32″ (0.03125″) in diameter, which sounds small but it is still pretty big in relation to the the size of the geometry that was being cut. After the logo was cut out using the 1/32″ bit, a 1/8″ bit was used to remove the material around the perimeter of the stamp. We cut to a total depth of 0.060″, using 2 passes at 6 ipm. The dremel speed is variable and is at about half. The total cut time was 20 – 25 minutes or so.
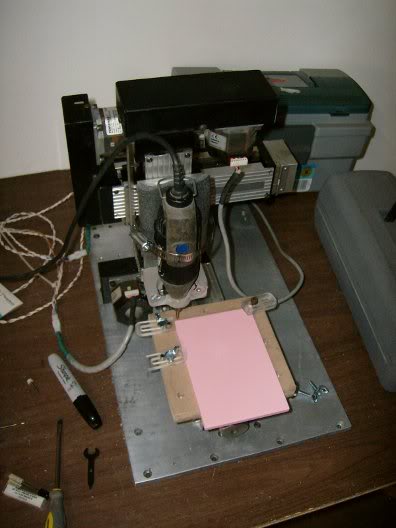
Here’s our machine in all its glory.

A close up of the 1/32″ bit. We made those hold downs on the engraver too!
.

The 1/32 end mill cuts pretty good.

Cutting: Complete
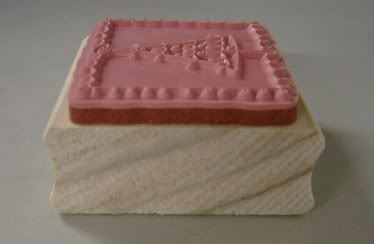
While at the craft store acquiring stamp rubber, I noticed that Christmas stamps were on super-clearance. At 30 cents each I had to grab a bunch to use just the handles. Notice that there is a layer of soft foam between the rubber and the wood handle. It was possible to peel away the rubber and leave the foam attached to the wood. Next up was to glue our stamp to the clearance stamp handle! We are now in passport-stamping business.
Christmas Tree stamp.

Done Deal!
If there are any hackerspaces out there that lack the capability to make their own passport stamps, contact us and we will cut them out for you at material/shipping cost, or stop by with your own material and leave with a stamp.
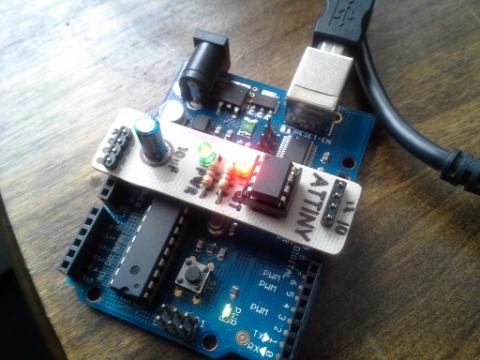
Making an Arduino Shield for Programming ATTINY Chips
 My original ATTINY mini shield was a great idea in concept, and it worked as anticipated. However, since the mini shield was sooo small, it was a pain to make sure that it was lined up correctly on the arduino pins. There was a definite possibility to install it in the wrong pins and I didn’t want to find out what happened when it was plugged into the wrong pins. Here’s the mini shield:
So I decided to redesign the board, making it a little bigger so that it fully fills up 2 of the 4 banks of female pin headers on the Arduino. I’m hoping this will make it harder to screw up installing the shield onto the Arduino.
Program an ATTINY using an Arduino
 After recently finishing my ATTINY Programming Shield for Arduino Project, I was getting anxious to start trying to program some chips. Although I was eventually successful, this was definitely a learning experience. I will document what I did on this web page.
Here’s what I used:
Arduino Uno with ATmega168
Arduino IDE 1.0.1
ATTINY85 chip
My DIY ATTINY programing shield (or breadboard)
Phone Charging Station
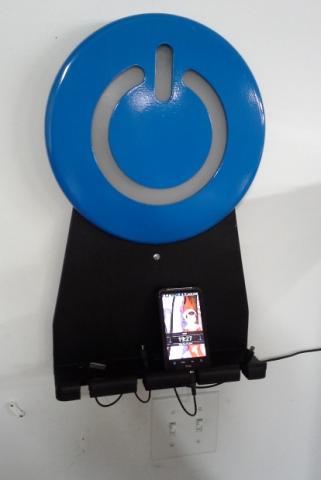 A common occurrence out our hackerspace has been phones running out of juice. We did not have an organized USB cord collection and members were often running around looking/asking for the appropriate charge cord for their particular phone. We decided to make a dedicated phone charging station with all the most popular phone charging cords.
Below is the MDF frame that was cut out on a CNC Router. Inside the circle you can see that a lot of material was removed from behind the main panel. This made room for the USB hub that will be used to charge the phones. There are 4 t-shaped slots that will allow the phone to sit on the shelf and allow the cord to go down through the shelf. There is a quarter-round piece of wood glued on the shelf to prevent the phone from slipping out. This piece will be trimmed on the band saw later. Continue reading
3 Axis Pololu Stepper Driver Breakout Board
 I finally got a chance to take some better pictures of this breakout board. My plan for this board is to
have a very generic set-up able to drive up to 3 bipolar stepper motors utilizing the ubiquitous and inexpensive Pololu drivers. The drivers plug into headers which I choose simply because I have a bunch of them laying around.